I am obsessed with all things DIY.

I see it,

I love it,

I make it.


Thursday, February 13, 2014

DIY Animal Keychains


After making my Animal Jars I ended up with a bunch of left over animals but had no clue what to do with them.  I was on Pintrest today and saw this tutorial by Ginger Snaps on making DIY Animal Keychains.....

what you need: plastic animal(s), small screw eye hook, paint/brush, key ring, *optional: clear sealant spray or clear nailpolish, safety pin, small bowl

I bought a new batch of animals because a coworker wanted a elephant so I used a 40% off coupon from Michaels to get them. 

This is my selection of animals that I am going to work with.  I decided on the parakeet, elephant, chimpanzee, giraffe, panda, corgi, polar bear, and rat.   
Next I got all my supplies together so I could get started.  I purchased Martha Stewart High Gloss in Black and Sea Glass in Satin.  I also picked up Glitter Acrylic Paint from Martha to jazz up the overall look of the key chains.  I bought a pack of Metallic Sharpies for decorating. 
 Let's get to painting!
You lookin at me?

Before


These are one coat of paint.  Some of the animals will only need one or two coats.  The giraffe and elephant required 4 coats.  Be patient and let each coat dry thoroughly before applying the next coat.
 3 coats of paint
After 2 coats of paint

Mr. Polar Bear only required 2 coats and I was anxious to see how the glitter was going to turn out so I applied a coat to  him.  The 2nd picture is after one coat.  Didn't really do too much but I let this coat dry and applied 3 coats of the glitter.

Time to switch to the animals that will be painted black.  I selected the chimp, gator (which I added later), and rat to paint black.


The animals painted black only required one coat of paint.  I let them dry for 4 hours once all the animals were evenly painted then cruised Pintrest looking for decorating ideas.  I found a few things but decided to go with the flow of each animal. 

Once they were all decorated it was time to put the small screw eye hook into the animal.  I used a safety pin to start the hole I found it was easier this way.


 I grabbed a pair of pliers to assist with the turning of the screw because just be warned it will hurt your fingers after you do a few.


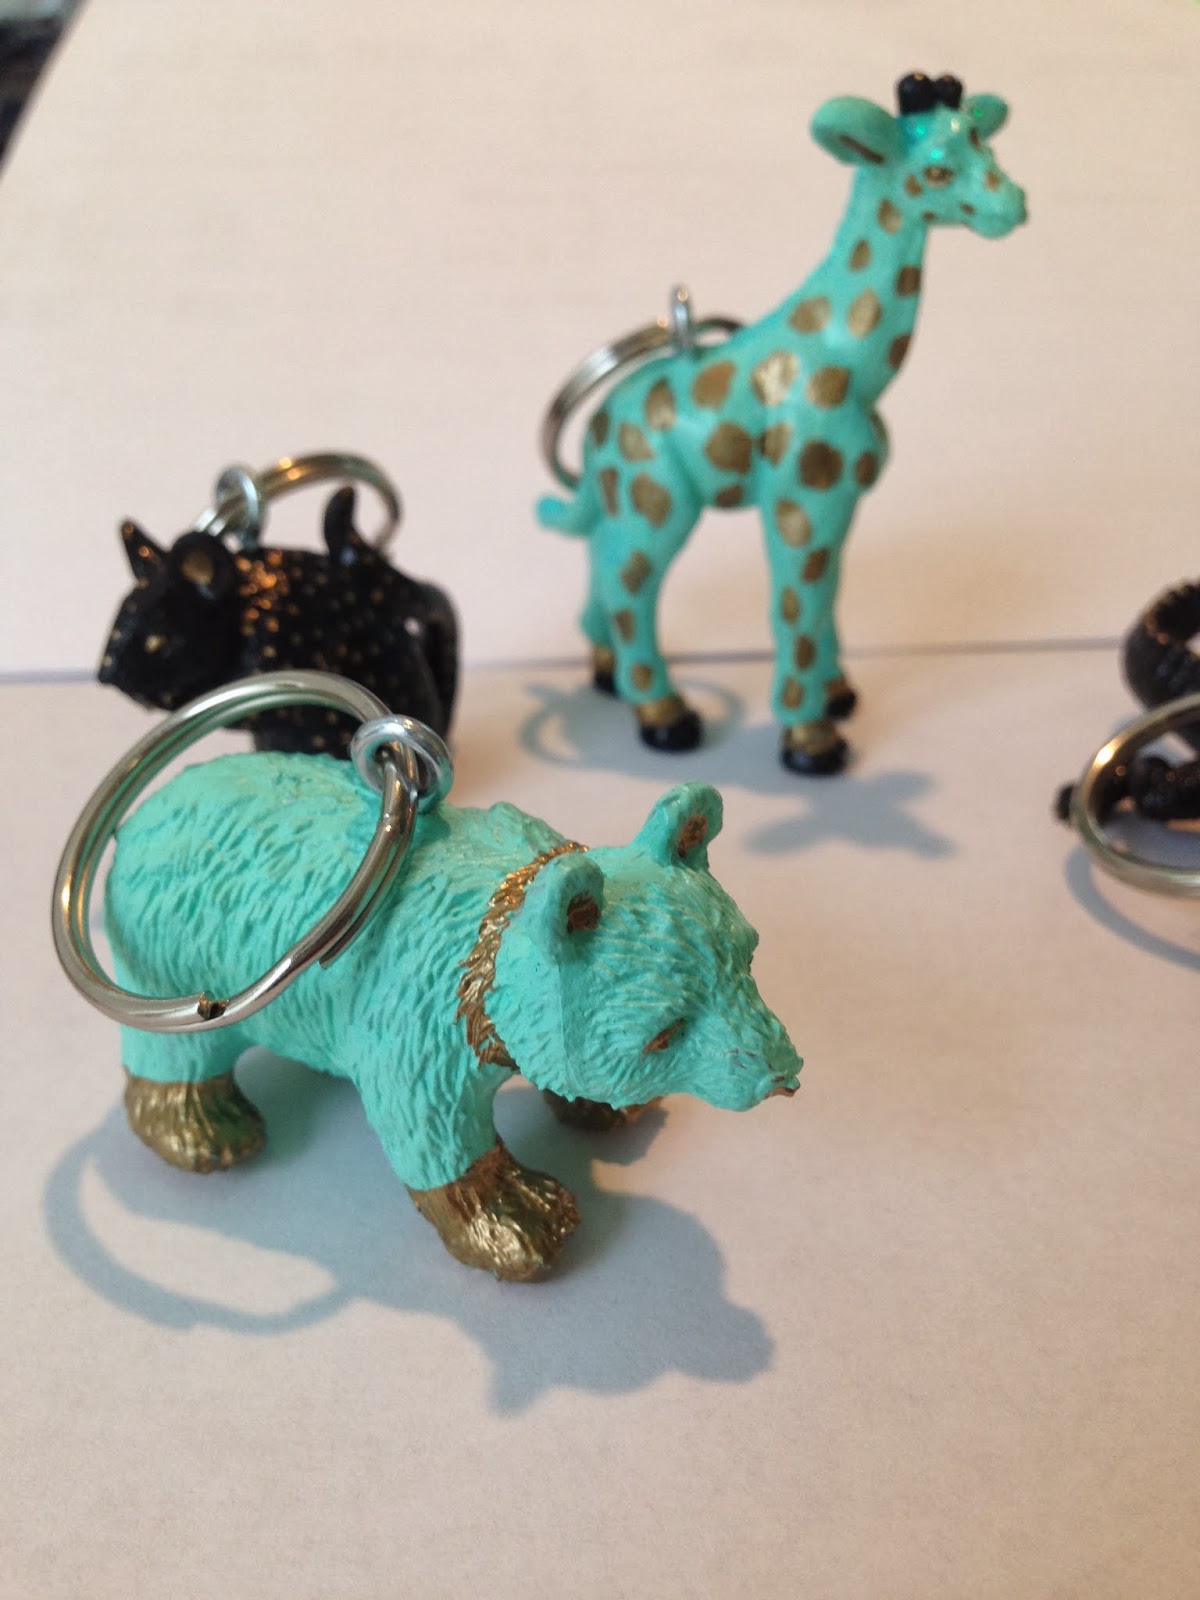
After the gator had his screw I grabbed a key ring and slid it through the hook.  So the pictures below are the finished products.  I think they turned out fabulous!!!


Thursday, February 6, 2014

The Grinch - Valentines Edition

After all the work that went into making Sir Grinch I felt that he needed to be part of my office decor 365 days a year.  Since Valentines Day is around the corner Grinchy Poo has been dressed accordingly.

Using the template I already had for his coat I cut out a piece of white felt.  I used Word to make 2 different size hearts and got to work cutting out the pieces. 

I glued hearts down the middle and smaller hearts on the sleeves.  I cut trim for the V-Neck and 4 stripes to put on the sleeves. 


I wanted Grinchy to have some fly kicks so I made him some Nikes from the template I made his Santa booties from.  

I stopped by the dollar store and picked up some hearts to embellish the background and here he is, all ready for V-Day.


The Grinch - The Beginning

During Christmas our office has a Door Decorating Contest which I have won 2 years running.  Last year we made a Frosty the Snowman out of Styrofoam cups after seeing something similar on Pintrest.  

2012 Door Contest Winner

All of the snow flakes were cut out using a Cricut machine and all together took 3 people 40 hours total to make.  I love the way he turned out and since we had won I knew we had to step it up a notch. 

I was all over Pintrest searching for inspiration on a door design.  Everything I saw was ok but nothing that was like BAM this is a winner.  I saw a Grinch door that looked ok but wasn't a winner.  

Then I came across this picture and I KNEW it was a winner:
Since there were 3 of us to do the door I assigned my coworkers the background and the Arrest Plate. I took on the enormous task of pulling the Grinch himself together. 

I spent the day researching what the Grinch's body looked like and started sketching out templates to use for his head, hands, belly, and legs.  I pulled up a full body pic of him and discovered the Grinch has some scrawny legs.  I used our office copy machine to enlarge his head to a good size then went from there.  I sketched out a pattern for his coat since it was going to be the focal piece of him.  From there I did a half oval for his belly.  I used my hands turned sideways on a piece of paper to use for his hands.  The legs were pretty easy.  I copped out on his feet and decided to cover them with booties instead.


I went by Michael's to get green poster board but found bulletin board paper instead.  I got green and red.  Using my templates, I cut out his hands, legs, and head using the green paper.  This really helped because I was all set with my basics and it was time to get supplies.  

I enlisted my mother for help and we hit Joann's Fabric Store to find some green felt or fun fur to use as his body.  I found neither.  I was so discouraged but my mom being the every optimistic light of my life said let's go look at the yarn.  Seriously mom but ok.  We're perusing the yarn section and they have 2 aisles full, who knew?  She found this very weird yarn called Fun Fur in the exact lime green that the Grinch is.  Then she says, "Hear me out, how about we crochet him?"  I said yeah no.  "Trust me he is going to be awesome."  Who am I to argue with the woman who gave birth to me?


We purchased 5 skeins of this stuff.  Thankfully I had a 40% off coupon so it ended up being $15 for the yarn. I also picked up Pipe Cleaners, foam sheets that had sticky stuff on the back in yellow and black, and some felt in red and green.  

My mom and I went back to her house to get started.  I was going to do the hands and feet, mom was doing the belly.  She taught me how to do a single chain stitch so I got busy.  After I had a chain long enough I started hot gluing to the background for his leg.  


Fingers + Hot Glue = OUCH

I burned my fingers more than I am going to admit on this blog.  It took me 4 hours to make his hands and legs.  My mom crocheted his belly for 6 hours.  We did this all day Saturday.  So Sunday we finished up and my mom started a circle for his head.  I had to go so she didn't get a chance to finish it up but my coworker knew how to crochet so she said she would help finish it.  

Go to work the next day and start the task of assembling.  My other coworker put up the background for the police lineup and drew in the lines for his height.  I cut out his coat using felt and lined the edges with cotton balls.  Using the head template as a guide, I used double sided sticky tape to put up the coat, belly, legs, and his booties. 

 
I started assembling his face using the head template and got a little silly
Then got it back together and this was the outside of his head.
His eyebrows and mouth are pipe cleaners that I shaped.  His eyes are made from the foam I purchased from Joann's.  My coworker was finished with the middle of his face so this is it put together.  

I used hot glue for the eye brows and mouth.  The foam for his eyes, nose, and forehead were already sticky.  So now came time to put his head on. I used a cheap dollar store hat embellished with cotton balls for his Santa hat. 


Next up was the sign.  My coworker made it at home and I strung it using satin cording.  This is the finished Grinch.
He is FABULOUS!  We won first place again!  I was out of town during the announcement of the winner so I received a text from my mom asking who won.  She had really gotten into it since she was a huge contributor to making this happen. 


Wednesday, February 5, 2014

DIY Thrift Store Jewelry Holder

I have an amazing amount of jewelry and on the weekends I put it all away.  During the week, it usually end up throwing it on my nightstand so it starts to pile up.  Not good when you live with someone who is OCD about clutter. 

I was on Pintrest one evening and came across this picture but it didn't have any instructions...


It was exactly what I was looking to make.  So I hit the Thrift Store and found 2 plates and a candle
stick to try this jewelry holder out.

Try #1

Sorry I don't have pictures of me making this, it was pretty easy.  I glued the top and bottom of the candle stick, then put the smaller plate on top, the bigger plate on the bottom.  I went to eat at PF Chang's and the waitress gave me the Lucky Cat figurine on top.  I glued him in the middle to hold my hoop earrings.  I now keep my most worn pairs here for easy accessorizing in the morning.

This option worked for a while but I felt like I needed another level.  So I was out at the thrift store (again) and found a plate that would work with the color scheme. It was 50% off of $1.90 and the candle stick was $0.90 so $1.85 for both items.

 I got my Tacky Glue out again and got to work.


First I glued the top and bottom of the candle stick, just like before.  I glued the bigger part to the middle of the plate, then the smaller part to the existing one I already had put together.

If I had planned on doing a 3 level holder I would have put the green candle stick on the very bottom since its bigger.  But it looks ok from the top and gives me more storage space.


Finished product.  I love the Lucky Cat the most of all.  He's so cute perched on top of the plate.